Step 1: What visuals can you gather from your client?
Typically, you’ll get your client’s permission to discuss them in a case study.
Since you’re telling their story, see if they’ll also give you permission to use some of their visuals:
Photos of the office or team
Photos of how they worked with you
Videos you or they have created
Whitepapers, blog posts, or articles about your work together
Their logo
Link to their website
Armed with all this material, you’re ready to start thinking about how to organize your Qwilr Page.
Step 2: What’s the structure of a case study?
A case study follows a standard format, usually including these sections:
Some background on your client and their company. Where are they located, who do they serve, what do they offer?
Explain the problem they needed to solve before you started working with them. What impact did this problem have on the business?
Describe how you helped solve your client’s problem. What products, services, and innovations did you provide? What went into implementation?
It’s good to be very concrete here. Exactly how much did sales increase, for example, or lost business decrease? How long did those results take?
You can add more sections to help tell your story, but keep in mind that a case study should also be concise and easy to digest. That’s where Qwilr’s layout tools really help.
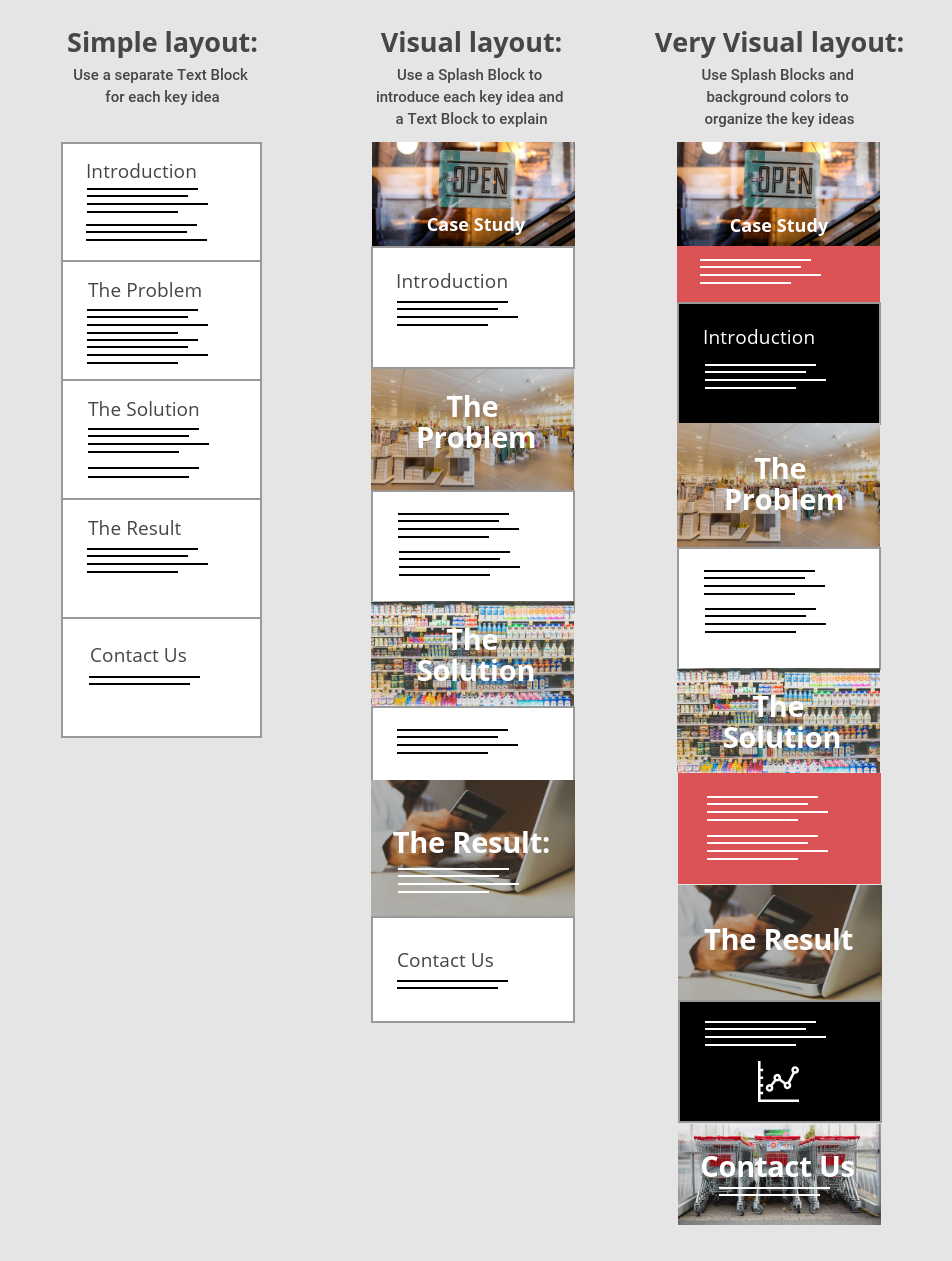
Step 3: Coming up with a layout
You can make the layout of your case study as simple or fancy as you like.
You know your audience best. Some readers will prefer a very simple, text-only presentation. For others, you might want to create something much more visual.
Here are just a few possibilities:
...And don’t forget, you can enbance your storytelling by adding videos, embedding content from other websites, or embedding PDFs, spreadsheets, or slideshows.
(In fact, once you have a case study built, you can always clone it and make dressed-up and dressed-down versions to communicate with different kinds of audiences.)